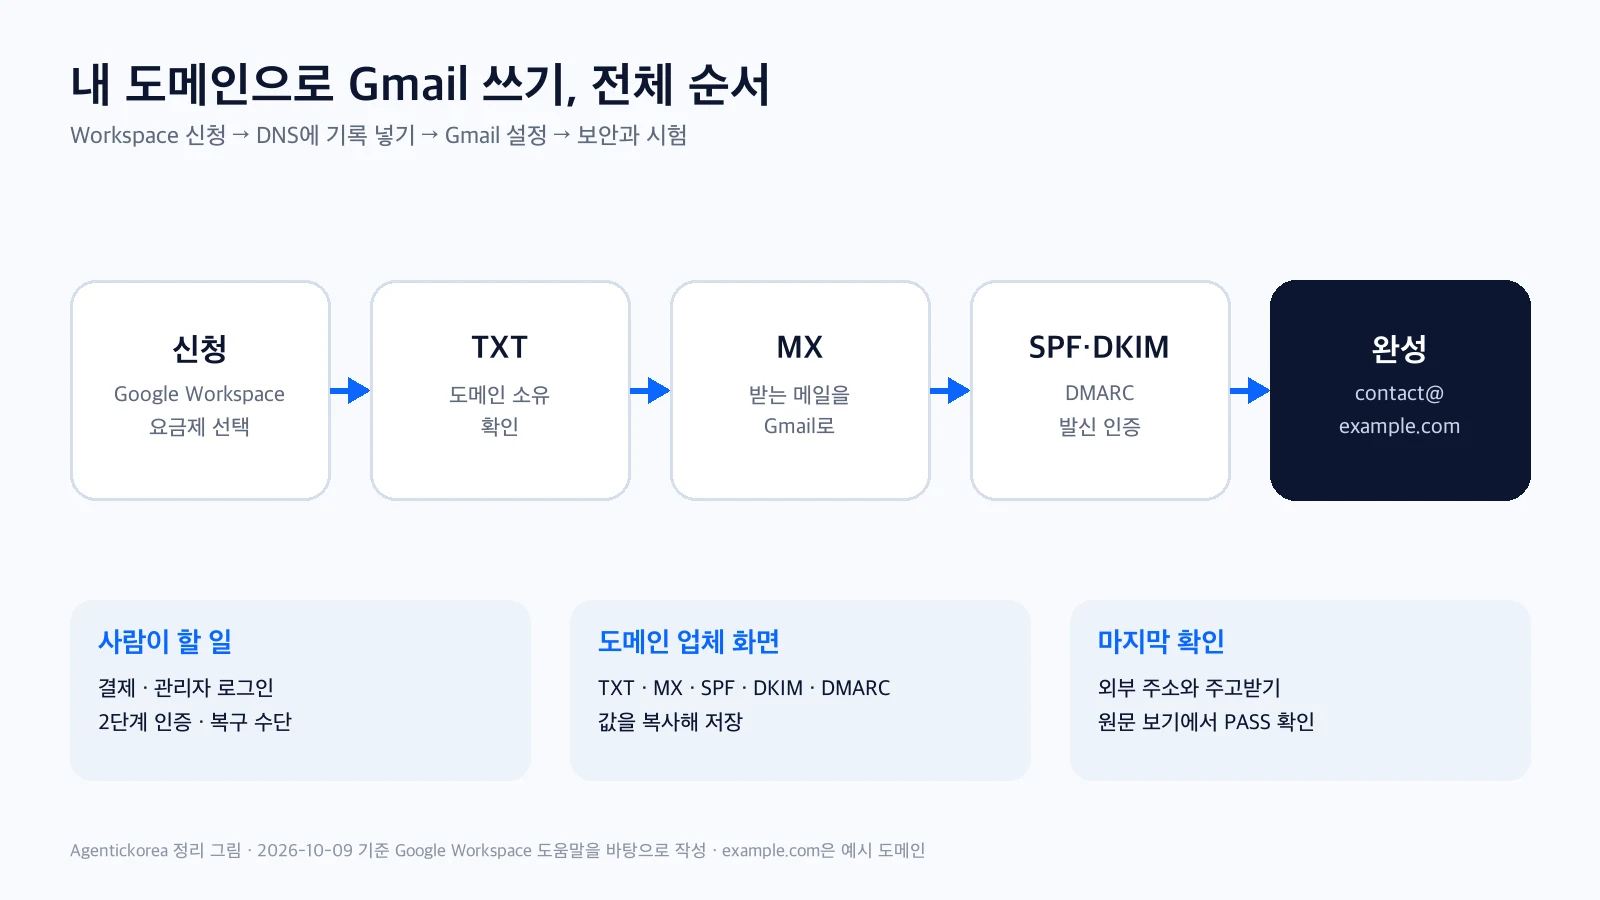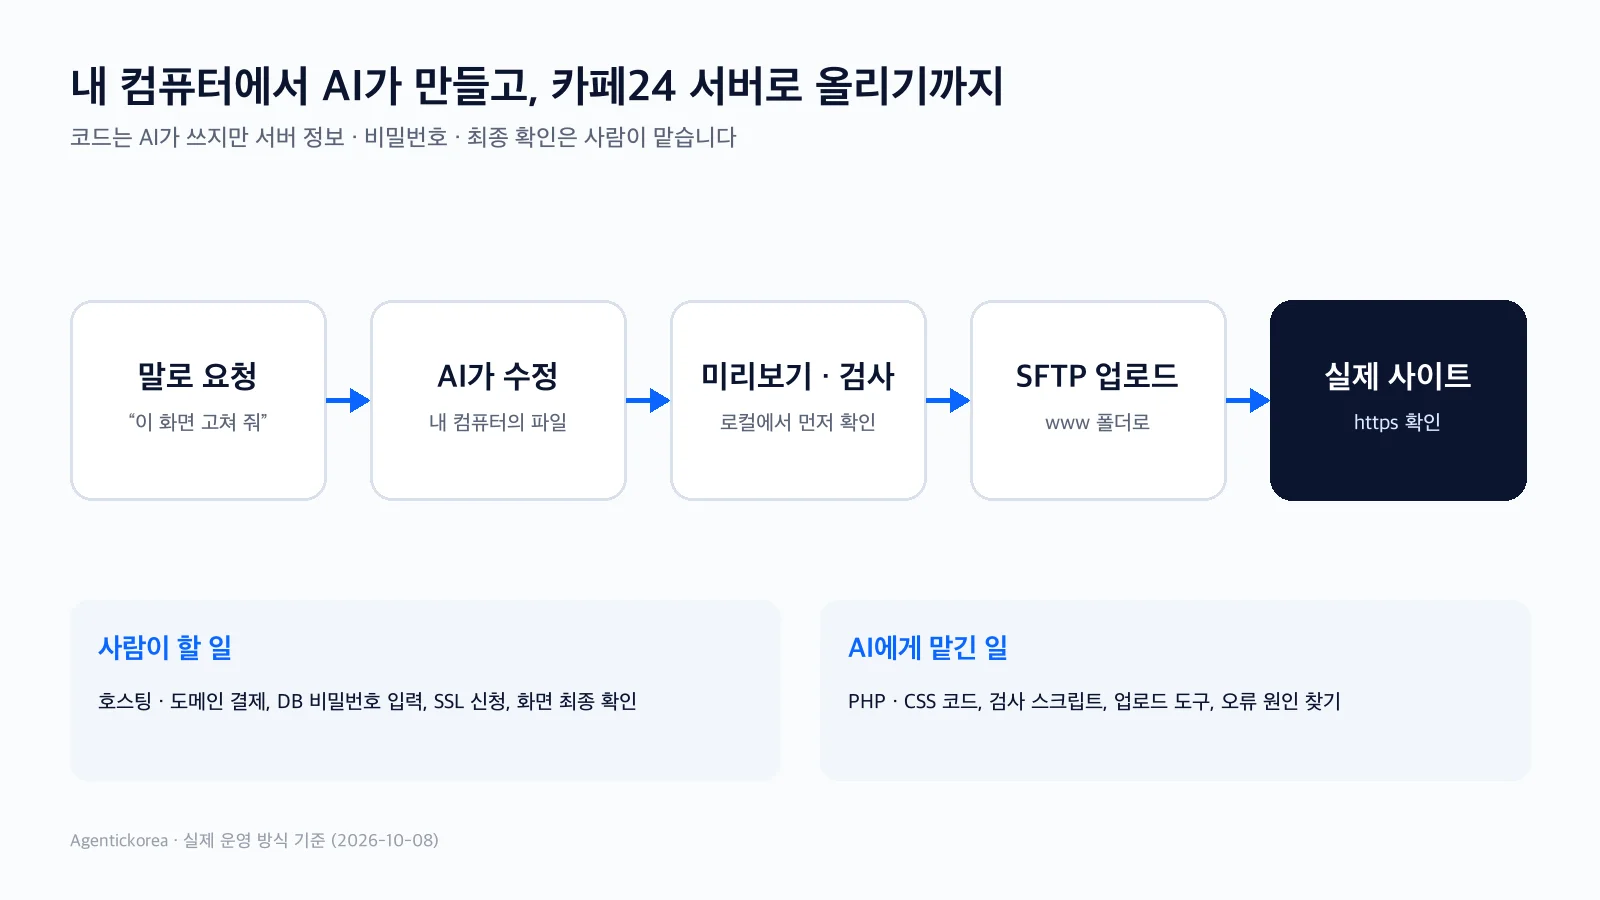
How to store website inquiries in the database first, send notifications from a Google Workspace domain address, reply through Gmail, and handle validation, spam, secrets, failures, and retries.
Once you have a domain address like `contact@example.com` from Part 1, the next common job is connecting it to your website's inquiry form. A visitor leaves an inquiry, you get a notification in Gmail, and clicking Reply sends your answer straight to the visitor.
It is tempting to think, "Just email the inquiry and be done." But a brief email failure should never make an inquiry disappear. So this guide is built on one rule:
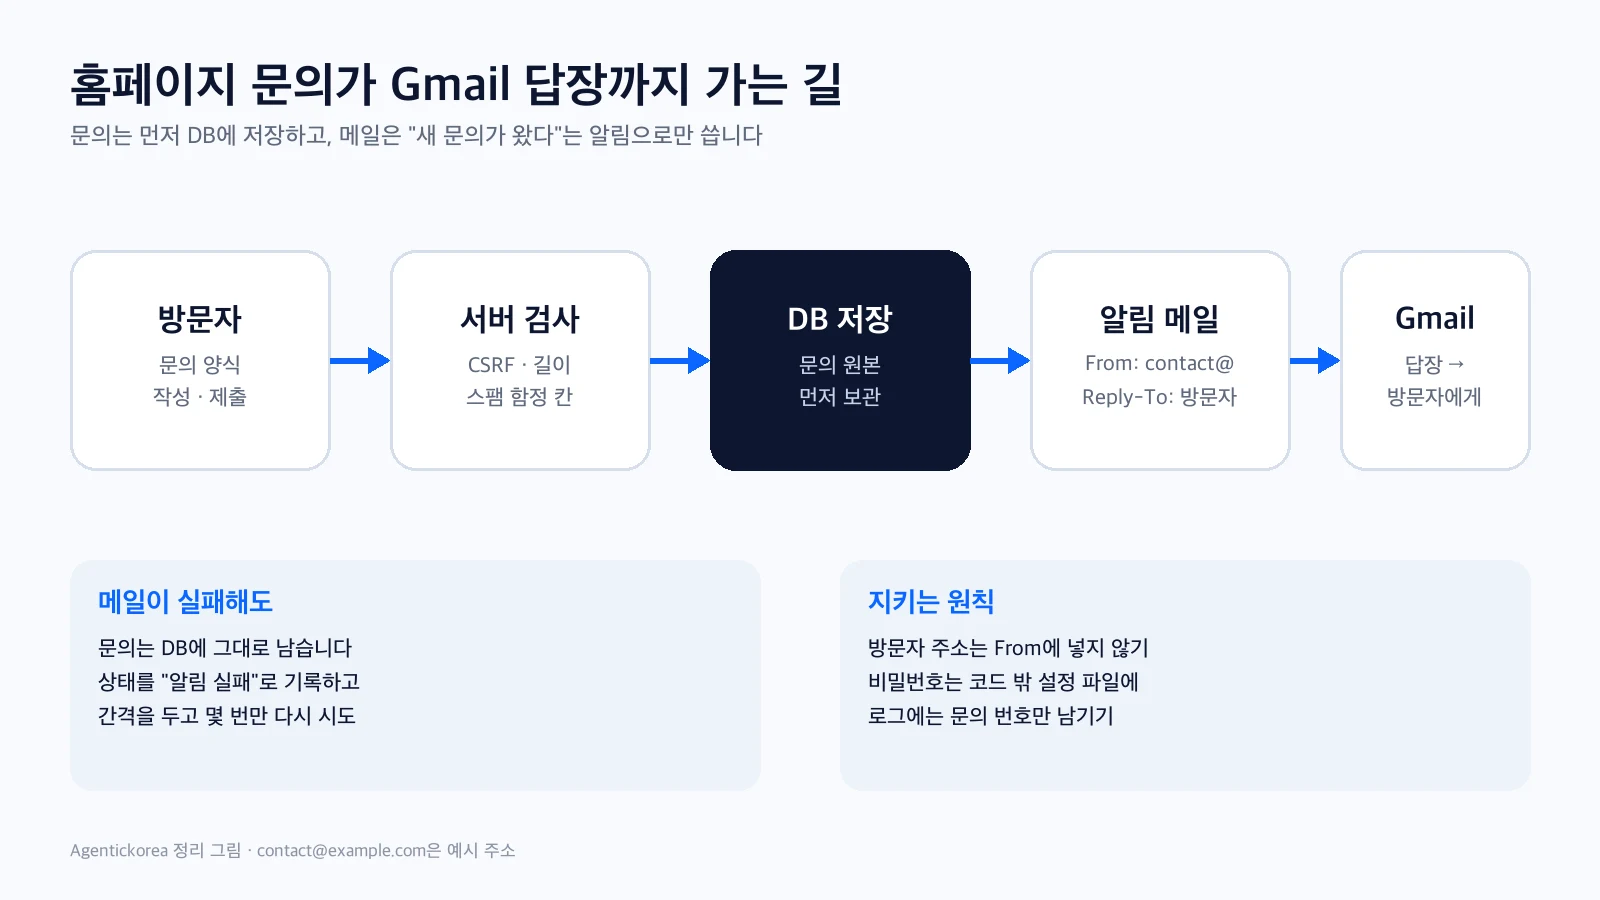
Save the inquiry in the database first, and use email only as a notification that a new inquiry has arrived.
The PHP and MariaDB examples here are small samples for understanding the structure, not finished code to copy as is. When you apply them to a real site, review them against your framework, your privacy policy, and your hosting environment.
The order in which an inquiry is handled
When a visitor enters a name, email address, and message and submits the form, these things should happen in order:
1. The server checks that the input is valid.
2. The inquiry is saved in the database.
3. Once the save succeeds, the visitor sees a "Received" screen.
4. The server sends a new-inquiry notification to `contact@example.com`.
5. When the administrator clicks Reply in Gmail, the visitor's address is filled in as the recipient.
6. If sending fails, the inquiry stays put, the failure is recorded, and the send is retried.
The database is the archive of originals, and email is the doorbell. A broken doorbell does not make the package disappear. Likewise, if a notification fails, the original inquiry must still be in the admin screen.
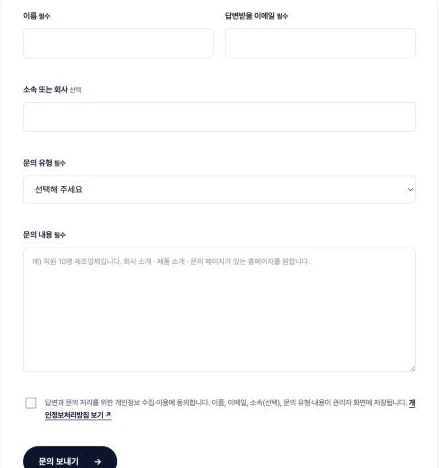
For reference, the inquiry form on this blog (Agentickorea) also saves inquiries to the admin database first. It does not send notification emails yet, though. For now, new inquiries are checked in the admin screen.
Four terms first
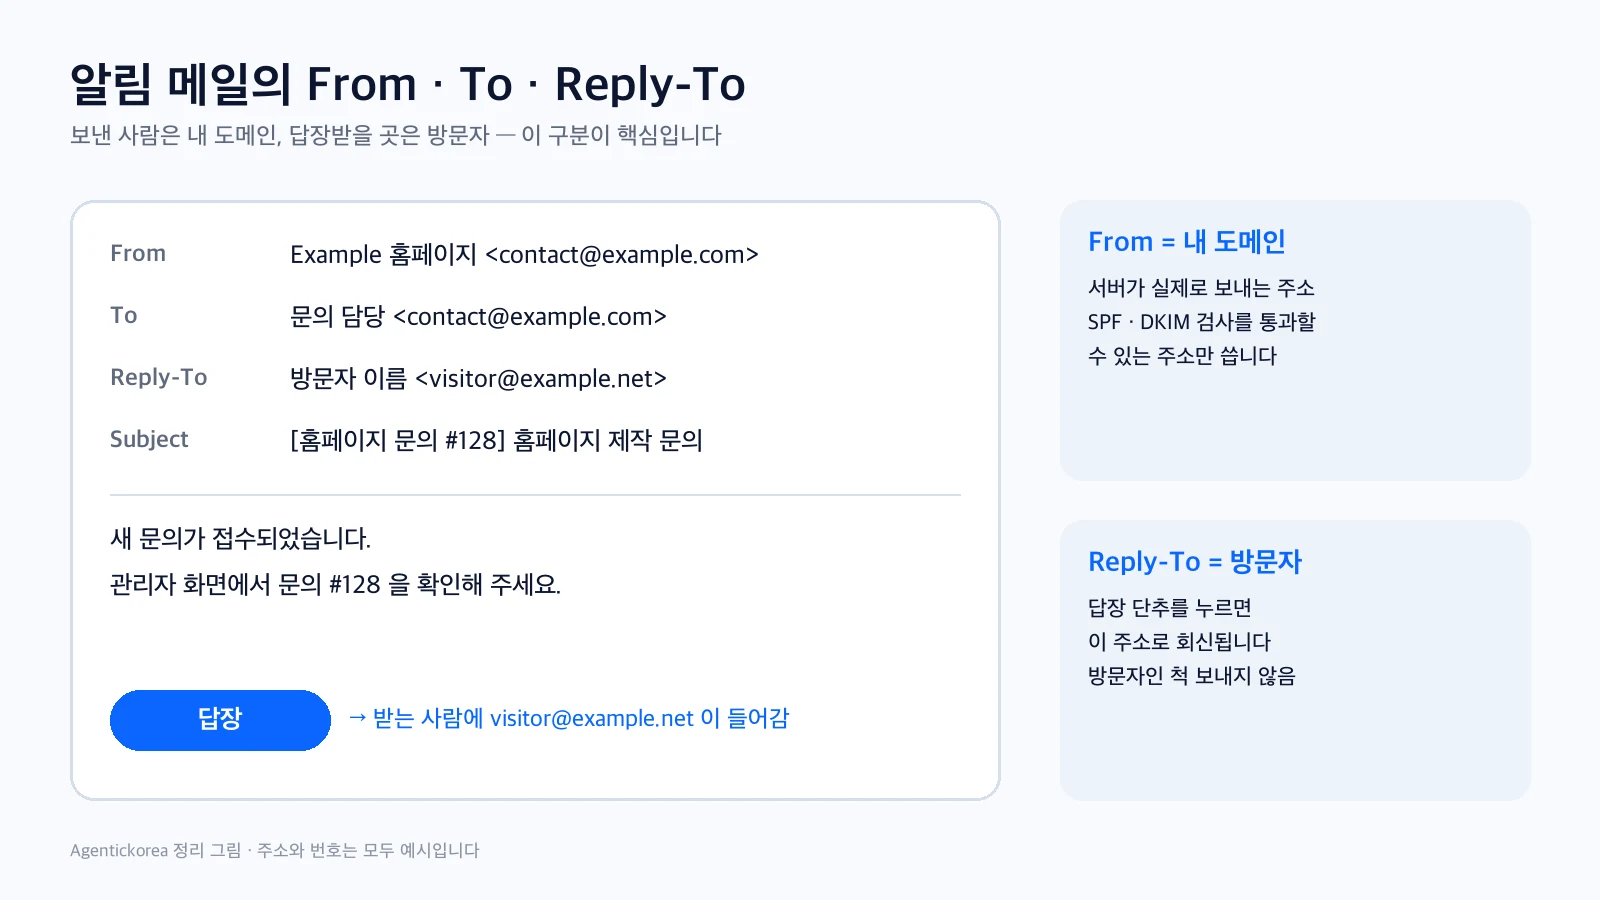
From is the sender. For website notifications, use a verified address on your own domain, such as `contact@example.com`.
To is whoever receives the notification. If you run things alone, the same `contact@example.com` mailbox can receive it. In a team, you can use a group address for the people in charge.
Reply-To is the address that receives replies. Put the visitor's email here, and when the administrator clicks Reply in Gmail, the answer goes to the visitor.
SMTP is the protocol that delivers email. Think of it as the counter where your website hands a notification over to Google or a mail delivery service. An SMTP relay is the service that takes that message and passes it on to its real destination.
The most important distinction: never put the visitor's address in From. The visitor did not send mail from your web server. If the server pretends to be the visitor, SPF and DMARC authentication break, and the message may be marked as spam or rejected.
Step 1. Create a table to store inquiries
Create a table that keeps the original inquiry together with its notification status.
CREATE TABLE inquiries (
  id BIGINT UNSIGNED AUTO_INCREMENT PRIMARY KEY,
  name VARCHAR(100) NOT NULL,
  email VARCHAR(254) NOT NULL,
  subject VARCHAR(150) NOT NULL,
  message TEXT NOT NULL,
  mail_status VARCHAR(20) NOT NULL DEFAULT 'pending',
  mail_attempts TINYINT UNSIGNED NOT NULL DEFAULT 0,
  mail_sent_at DATETIME NULL,
  created_at DATETIME NOT NULL DEFAULT CURRENT_TIMESTAMP
);
`mail_status` shows whether the notification is pending, sent, or failed. `mail_attempts` records how many tries were made, and `mail_sent_at` records when it was actually sent.
Keeping the inquiry and its mail status in the same row makes it easy to find cases where the inquiry was saved but only the notification failed. A real service may also need columns for handling status, privacy consent time, and inquiry type.
Step 2. Validate again on the server, not just in the browser
Adding `required` to an HTML field does not finish validation. An attacker can send values straight to the server without going through the browser form. The server needs to check again:
• Is the request method POST?
• Does the CSRF token match the current session?
• Are the name, subject, and message within the allowed lengths?
• Is the email address well formed?
• Is the inquiry type on the allowed list?
• Was the privacy consent box checked?
• Is the hidden anti-spam field empty?
In PHP, you can check the email format like this:
$email = trim((string) ($_POST['email'] ?? ''));

if (!filter_var($email, FILTER_VALIDATE_EMAIL)) {
    throw new RuntimeException('Please check your email address.');
}
`FILTER_VALIDATE_EMAIL` checks only the format. It does not mean the mailbox exists. Stripping characters such as quotes from names also breaks perfectly valid names. The essentials are to set a length and format for each field, use prepared SQL when saving, and apply HTML escaping when displaying values again.
Step 3. Block CSRF and automated spam together
A CSRF token is a temporary ticket that confirms the form was opened normally on your site before it was submitted. The server stores a random value in the session, puts the same value in a hidden form field, and compares the two on submission.
// When showing the form
$_SESSION['csrf'] ??= bin2hex(random_bytes(32));

// When receiving the submission
if (!hash_equals($_SESSION['csrf'], (string) ($_POST['csrf'] ?? ''))) {
    throw new RuntimeException('Please try again.');
}
Spam protection should not depend on a single trick.
• Add a trap field that people cannot see, and reject submissions that fill it in.
• Limit how many times one visitor can submit, for example a few times per hour.
• Set maximum lengths for the name, email, and message.
• Log unusual patterns, such as rapid repeated submissions.
• Consider extra measures such as CAPTCHA only when attacks increase.
You can rate-limit requests over short periods without storing raw IP addresses for a long time. Your privacy policy should describe how inquiry data is used and how long it is kept, matching how you actually operate.
Step 4. Save the inquiry first with prepared SQL
A prepared statement sends the user's text and the SQL command to the database through separate channels. It is the basic defense that keeps quotes or SQL-looking text in a message from running as a command.
$stmt = $pdo->prepare(
    'INSERT INTO inquiries(name,email,subject,message) '
    . 'VALUES(:name,:email,:subject,:message)'
);

$stmt->execute([
    'name' => $name,
    'email' => $email,
    'subject' => $subject,
    'message' => $message,
]);

$inquiryId = (int) $pdo->lastInsertId();
If the inquiry could not be saved, do not show the "Received" screen. On the other hand, if the save succeeded and only the email failed, there is no need to ask the visitor to submit again. That would just create a duplicate.
Step 5. Separate saving from sending
The most common mistake in a first build is tying saving and emailing into one lump. A safer flow looks like this:
$inquiryId = saveInquiry($pdo, $data);

try {
    sendInquiryAlert($inquiryId, $data);
    markMailSent($pdo, $inquiryId);
} catch (Throwable $e) {
    markMailFailed($pdo, $inquiryId);
    error_log('inquiry_mail_failed id=' . $inquiryId);
}

showThankYouPage();
This code keeps the visitor's name, email, message, and any password out of the failure log. Operational logs should hold only what you need to fix the problem, such as the inquiry number and the type of failure.
If your SMTP connection is slow enough to keep visitors waiting, it is more reliable to save to the database during the submission and let a scheduled job (cron) send notifications for inquiries marked `pending`.
Step 6. Prepare the Google Workspace SMTP relay
When devices or apps send mail through Workspace, Google recommends the SMTP relay first. In the Admin console, go to Apps → Google Workspace → Gmail → Routing and configure the SMTP relay service.
For website notifications, you can start with these principles:
• Allowed senders: only addresses on your domain
• Authentication: register your hosting server's fixed public IP, or require SMTP authentication where supported
• Encryption: require TLS
• Sending server: `smtp-relay.gmail.com`
• Port: 25, 465, or 587, whichever your host allows. For TLS connections, 587 is usually the one to look at
Changes can take up to 24 hours to apply, so do not keep changing the rules right after saving. Check test messages and error logs first.
On shared hosting, check a few things first
Shared hosting, such as Cafe24 (a major Korean hosting company), puts many sites on one server at low cost. It may not give your site its own fixed sending IP, and outgoing SMTP ports may be blocked. In that case, following only the Admin console's IP-allowlist method will not connect.
Ask your hosting provider:
• Are outgoing SMTP connections allowed?
• Can you use port 587 with STARTTLS?
• Do they provide a fixed outgoing IP that the outside world sees?
• Can you use Composer and scheduled jobs (cron) on the server?
If there is no fixed IP, or Google's authentication methods do not fit your hosting environment, do not force a workaround. For low volumes, you can check whether your account policy allows Gmail SMTP with an app password. For production inquiry notifications, a transactional email service that uses an API key is another option.
Transactional email is mail sent one message at a time as part of how a service works, such as inquiry notifications, password resets, and order confirmations. Its purpose differs from newsletters or bulk advertising. Whichever method you choose, your SPF and DKIM must include the service that actually sends the mail.
Step 7. Keep passwords out of the code
Never write a password directly into a PHP file.
// Do not store it like this.
$smtpPassword = 'real-password';
Passwords can leak through source repositories, error screens, and backup files. Keep the SMTP host, username, app password, or API key in server environment settings or a secrets file that cannot be downloaded from the web.
$smtpHost = getenv('SMTP_HOST');
$smtpUser = getenv('SMTP_USER');
$smtpPass = getenv('SMTP_PASS');

if (!$smtpHost || !$smtpUser || !$smtpPass) {
    throw new RuntimeException('Mail server settings are missing.');
}
A structure that lets you change secrets without editing code is best. In production, error screens should never show credentials or the SMTP conversation.
Step 8. Send with PHPMailer, keeping From and Reply-To separate
Rather than wiring SMTP authentication, TLS, and error handling around PHP's built-in `mail()` yourself, a well-maintained SMTP library is easier to understand and check. Here is a simplified PHPMailer example:
use PHPMailer\PHPMailer\PHPMailer;

$mail = new PHPMailer(true);
$mail->isSMTP();
$mail->Host = getenv('SMTP_HOST');
$mail->Port = 587;
$mail->SMTPAuth = true;
$mail->Username = getenv('SMTP_USER');
$mail->Password = getenv('SMTP_PASS');
$mail->SMTPSecure = PHPMailer::ENCRYPTION_STARTTLS;

$mail->setFrom('contact@example.com', 'Example Website');
$mail->addAddress('contact@example.com', 'Inquiries');
$mail->addReplyTo($email, $name);

$mail->Subject = '[Website inquiry #' . $inquiryId . '] ' . $subject;
$mail->Body = "Please check the inquiry in the admin screen.\nInquiry number: " . $inquiryId;
$mail->send();
The notification does not need to include the whole inquiry. Sending only the fact that a new inquiry arrived and the number to look up in the admin screen reduces the privacy risk if the email is forwarded or exposed.
If you use an IP-authenticated SMTP relay, the `SMTPAuth` and account settings will differ. Rather than trusting the sample as is, adjust it to the Google relay rule you chose and to your hosting environment.
Step 9. Retry failed emails
Networks and mail services can slow down briefly, so one failure should not be treated as permanent. For example, you can retry up to three times with growing gaps: after 5 minutes, 30 minutes, and 2 hours.
The retry job checks:
• Is `mail_status` either `pending` or `failed`?
• Has `mail_sent_at` already been recorded for this inquiry?
• Is the number of attempts below the maximum?
• Has the next retry time arrived?
When sending succeeds, record the status and the send time exactly once. Using a database lock so that two jobs never pick up the same inquiry at once prevents duplicate notifications.
The admin screen should distinguish "inquiry received" from "notification failed," so a saved inquiry is not missed even when no Gmail notification arrives.
Step 10. Reply from Gmail for real
Open the notification and click Reply. If the visitor's address is filled in automatically as the recipient, Reply-To is working.
Before sending, check:
• Is the sender `contact@example.com`?
• Is the recipient the visitor's address?
• Did any technical details or internal addresses from the notification stay in the reply?
• Is the inquiry and personal information shared with no more people than necessary?
Because the original inquiry lives in the admin database, changing its status, for example New → Read → Done, helps a team avoid missed or double replies.
Step 11. Test from start to finish
Before going live, test these scenarios using two different outside addresses:
• Is a normal inquiry saved to the database exactly once?
• Does refreshing the "Received" screen avoid saving a duplicate?
• Does the server reject a malformed email address and an overly long message?
• Do the trap field and submission limit work?
• Is the notification's From on your domain and its Reply-To the visitor?
• Does a reply from Gmail arrive at the outside address?
• Under Show original in the received message, do SPF and DKIM show PASS, consistent with your DMARC policy?
• If you deliberately break the SMTP connection, does the inquiry remain and the failure get recorded?
• After retries, does the same notification arrive only once?
• Are passwords and full personal data absent from the admin screen and logs?
Common mistakes
• Sending email before saving to the database: if the email fails, the inquiry can be lost too.
• Using the visitor's address as From: sender authentication breaks. Put the visitor's address in Reply-To.
• Writing the Workspace password into a PHP file: move it to environment settings or a server secrets file.
• Trusting the browser's `required` alone: check length, format, and allowed values again on the server.
• Building SQL by joining strings: use PDO prepared statements and parameters.
• Asking the visitor to resubmit when the email fails: separate "saved" from "notification failed."
• Retrying instantly and endlessly after every failure: limit the count and spacing.
• Logging the full inquiry and passwords in error logs: record only the inquiry number and error type.
• Assuming shared hosting has a fixed IP: check SMTP ports, outgoing IP, and cron support first.
• Sending newsletters through the inquiry notification path: keep service notifications and bulk marketing on separate purposes and tools.
When Part 2 is done
• Inquiries are stored in the database first.
• Notifications go out from the verified `contact@example.com`, with the visitor's address in Reply-To.
• If an email fails, the inquiry remains and the send is retried a limited number of times.
• Passwords live outside the code, and the admin screen shows notification status.
The heart of this structure is not the code that sends one message to Gmail. It is the save order that never loses the original inquiry, headers that never forge the sender, and records that let you see and recover from failures. Together, they make the system something you can trust for real work.
If Parts 1 and 2 felt like too many steps, Part 3 puts the whole picture on one page and collects example requests you can paste straight into an AI tool.
Information is current as of Oct 9, 2026. Google Workspace menus, sending limits, and authentication policies can change, so check the Admin console help pages and your hosting provider's latest guidance when you apply this.
Sources
Google Workspace 앱·기기 메일 발송 방법 ↗